Showing posts with label OpenCV Tutorials. Show all posts

OpenCV Tutorials

OpenCV Library, OpenCV API
OpenCV Cpp Tutorials
OpenCV, open source C++ library for image processing, originally developed by Intel. OpenCV is free for both commercial and non-commercial use. OpenCV library inbuilt functions mainly aimed at real time image processing. It consist of several hundreds of image processing and computer vision algorithms which make developing of applications easy and efficient. Computer vision which go beyond image processing, helps to obtain relevant information from images and make decisions based on that information.

OpenCV Features

  • Optimized for real time image processing & computer vision applications.
  • Primary interface of OpenCV is in C++ but also available in C, Python and JAVA.
  • OpenCV applications run on Windows, Android, Linux, Mac and iOS.
  • Optimized for Intel processors.
Download OpenCV

Visual Studio IDE

Microsoft Visual Studio 2015 is an integrated development environment (IDE) from Microsoft. It is used to develop computer programs for Microsoft Windows, as well as web sites, web applications and web services. Microsoft provides Community editions, which support plugins, at no cost to all users.
Download Visual Studio Community

OpenCV Tutorials List

OpenCV Tutorials, using OpenCV 3.1.0 and Visual Studio 2015 Community Edition on Windows 10:


Like, Share and Comment Below

Canny Edge Detection on Webcam

Steps to Canny Edge Detection on Webcam | OpenCV with Visual Studio in Windows 10. In this Tutorial, we are going to implement Canny Edge Detection on Webcam using OpenCV.
  1. First of all, Follow this tutorial to Install & Configure OpenCV with Visual Studio 2015
  2. #include<opencv2/core/core.hpp>
    #include<opencv2/highgui/highgui.hpp>
    #include<opencv2/imgproc/imgproc.hp>
    
    #include<iostream>
    #include<conio.h>         
    
    int main() {
     cv::VideoCapture capWebcam(0);   // declare a VideoCapture object to associate webcam, 0 means use 1st (default) webcam
    
     if (capWebcam.isOpened() == false)  //  To check if object was associated to webcam successfully
     {
      std::cout << "error: Webcam connect unsuccessful\n"; // if not then print error message
      return(0);            // and exit program
     }
    
     cv::Mat imgOriginal;        // input image
     cv::Mat imgGrayscale;       // grayscale image
     cv::Mat imgBlurred;         // blured image
     cv::Mat imgCanny;           // Canny edge image
    
     char charCheckForEscKey = 0;
     int lowTh = 45;
     int highTh = 90;
    
     while (charCheckForEscKey != 27 && capWebcam.isOpened()) {            // until the Esc key is pressed or webcam connection is lost
      bool blnFrameReadSuccessfully = capWebcam.read(imgOriginal);   // get next frame
    
      if (!blnFrameReadSuccessfully || imgOriginal.empty()) {    // if frame read unsuccessfully
       std::cout << "error: frame can't read \n";      // print error message
       break;               
      }
    
      cv::cvtColor(imgOriginal, imgGrayscale, CV_BGR2GRAY);                   // convert to grayscale
    
      cv::GaussianBlur(imgGrayscale,imgBlurred,cv::Size(5, 5),1.8);           // Blur Effect             
    
      cv::Canny(imgBlurred,imgCanny,lowTh,highTh);       // Canny Edge Image
    
      //declare windows
      cv::namedWindow("imgOriginal", CV_WINDOW_NORMAL);      
      cv::namedWindow("imgCanny", CV_WINDOW_NORMAL);    
      //declare trackbar
      cv::createTrackbar("LowTh", "imgCanny", &lowTh, 100);
      cv::createTrackbar("HighTh", "imgCanny", &highTh, 100);
      // show windows
      cv::imshow("imgOriginal", imgOriginal);                 
      cv::imshow("imgCanny", imgCanny);                       
    
      charCheckForEscKey = cv::waitKey(1);        // delay and get key press
     }
    
     return(0);
    }
    
    OR
    Get CannyCam.cpp from Github:
    Download CannyCam.cpp

  3. Paste full source code and Run it (Ctrl+F5 or F5).

OUTPUT
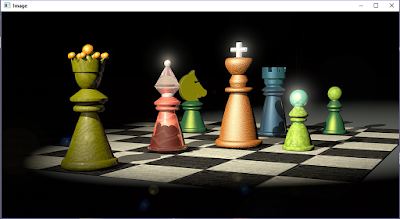
Input Image OpenCV
Original Webcam Image OpenCV
Canny Edge Detection Webcam OpenCV
Canny Edge Image Webcam OpenCV


Explaination : Function used: cv::Canny(imgBlurred,imgCanny,lowTh,highTh) - This function can process images and implement the Canny Edge Detector Algorithm.
  • 1st parameter is the source image.
  • 2nd parameter is the destination or resultant image.
  • 3rd parameter is the low threshold value.
  • 4th parameter is the high threshold value.
  •  

Like, Share and Comment Below. You may also like this


  • Apply Canny Edge Effect on an Image


  • Apply Canny Edge Effect on an Image

    Steps to Apply Canny Edge Effect on an Image | OpenCV with Visual Studio in Windows 10. In this Tutorial, we are going to apply Canny Edge Effect on an image using OpenCV.
    1. First of all, Follow this tutorial to Install & Configure OpenCV with Visual Studio 2015

    2. Copy the Full Source Code to Apply Canny Edge on an Image from here:
    3. #include<opencv2/core/core.hpp>
      #include<opencv2/highgui/highgui.hpp>
      #include<opencv2/imgproc/imgproc.hpp>
      
      #include<iostream>
      #include<conio.h>     
      
      int main() {
      
       cv::Mat imgOriginal;        // input image
       cv::Mat imgGrayscale;       // grayscale image
       cv::Mat imgBlurred;         // blured image
       cv::Mat imgCanny;           // Canny edge image
      
       imgOriginal = cv::imread("C:/Briefcase/Chess.jpg");        // open image
      
       if (imgOriginal.empty()) {                                  // if unable to open image
        std::cout << "error: image not read from file\n";       // show error message
        return(0);                                              
       }
      
       cv::cvtColor(imgOriginal, imgGrayscale, CV_BGR2GRAY);       // convert to grayscale
      
       cv::GaussianBlur(imgGrayscale,imgBlurred,cv::Size(5, 5),1.5);  // Blur Effect                     
      
       cv::Canny(imgBlurred,imgCanny,100,200);   //Canny Effect                    
      
       // declare windows
       cv::namedWindow("imgOriginal", CV_WINDOW_AUTOSIZE);     
       cv::namedWindow("imgCanny", CV_WINDOW_AUTOSIZE);     
      
       // show windows              
       cv::imshow("imgOriginal", imgOriginal);     
       cv::imshow("imgCanny", imgCanny);
      
       cv::waitKey(0);
      
       return(0);
      }
      
      OR
      Get CannyImg.cpp from Github:
      Download CannyImg.cpp

    4. Paste full source code and Run it (Ctrl+F5 or F5).

    OUTPUT
    Load an Image OpenCV
    Load Image OpenCV
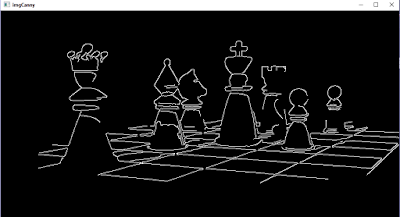
    Canny Edge Effect OpenCV
    Canny Edge Image OpenCV


    Explaination : Function used: cv::Canny(imgBlurred,imgCanny,100,200) - This function can process images and implement the Canny Edge Detector Algorithm.
    • 1st parameter is the source image.
    • 2nd parameter is the destination or resultant image.
    • 3rd parameter is the low threshold value.
    • 4th parameter is the high threshold value.

    Like, Share and Comment Below. You may also like this:


  • Canny Edge Detection on Webcam


  • Change Contrast of an Image

    Steps to Change Contrast of an Image | OpenCV with Visual Studio in Windows 10. In this Tutorial, we are going to increase and decrease contrast of an image using OpenCV.
    1. First of all, Follow this tutorial to Install & Configure OpenCV with Visual Studio 2015

    2. Copy the Full Source Code to Change Contrast of an Image from here:
    3. #include<opencv2/highgui/highgui.hpp>
      
      using namespace cv;
      
      int main()
      {
       //Load an Image
       Mat img = imread("C:/Briefcase/Chess.jpg", CV_LOAD_IMAGE_COLOR);
       namedWindow("Image", CV_WINDOW_AUTOSIZE);
       imshow("Image", img);
      
       //Change Contrast Effect
       Mat imgInc;
       img.convertTo(imgInc, -1, 2, 0);  //increase (double) contrast 
      
       Mat imgDec;
       img.convertTo(imgDec, -1, 0.5, 0); //decrease (halve) contrast
      
       namedWindow("Inc contrast", CV_WINDOW_AUTOSIZE);
       namedWindow("Dec contrast", CV_WINDOW_AUTOSIZE);
      
       imshow("Inc contrast", imgInc);
       imshow("Dec contrast", imgDec);
      
       //Wait Key press
       cvWaitKey(0);
      
       //destroy windows
       destroyAllWindows();
       return 0;
      }
      
      OR
      Get ChangeContrast.cpp from Github:
      Download ChangeContrast.cpp

    4. Paste full source code and Run it (Ctrl+F5 or F5).

    OUTPUT
    Load an Image OpenCV
    Load Image OpenCV
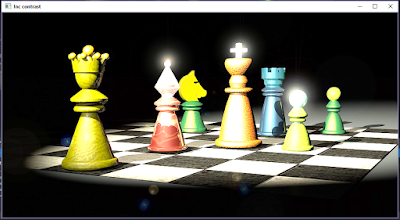
    Increase Contrast of an Image
    Increase Contrast of an Image - OpenCV
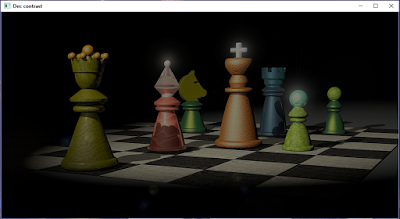
    Decrease Contrast of an Image
    Decrease Contrast of an Image - OpenCV


    Explaination :
    Function used:
    img.convertTo(imgInc, -1, 2, 0) - This function can process images and increase(double) contrast.
    img.convertTo(imgDec, -1, 0.5, 0) - This function can process images and decrease(halve) contrast.
    • 1st parameter is the output matrix.
    • 2nd parameter is Depth of the output image. If rtype is negative, output type is same as the input type.
    • 3rd parameter is the multiplication or scaling factor, every pixel will be multiplied by this value.
    • 4th parameter is delta factor added to the scaled values.


    Like, Share and Comment Below. You may also like this:


  • Change Brightness of an Image


  • Change Brightness of an Image

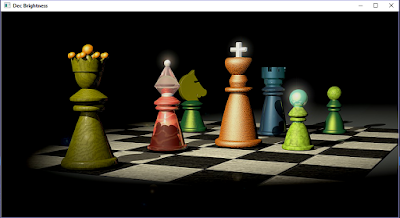
    Steps to Change Brightness of an Image | OpenCV with Visual Studio in Windows 10. In this Tutorial, we are going to increase and decrease brightness of an image using OpenCV.
    1. First of all, Follow this tutorial to Install & Configure OpenCV with Visual Studio 2015

    2. Copy the Full Source Code to Change Brightness of an Image from here:
    3. #include<opencv2/highgui/highgui.hpp>
      
      using namespace cv;
      
      int main()
      {
       //Load an Image
       Mat img = imread("C:/Briefcase/Chess.jpg", CV_LOAD_IMAGE_COLOR);
       namedWindow("Image", CV_WINDOW_AUTOSIZE);
       imshow("Image", img);
      
       //Change Brightness Effect
       Mat imgInc;
       img.convertTo(imgInc, -1, 1, 25);  //increase brightness by 25 units    
      
       Mat imgDec;
       img.convertTo(imgDec, -1, 1, -25);  //decrease brightness by 25 units
      
       namedWindow("Inc Brightness", CV_WINDOW_AUTOSIZE);
       namedWindow("Dec Brightness", CV_WINDOW_AUTOSIZE);
      
       imshow("Inc Brightness", imgInc);
       imshow("Dec Brightness", imgDec);
      
       //Wait Key press
       cvWaitKey(0);
      
       //destroy windows
       destroyAllWindows();
       return 0;
      }
      
      OR
      Get ChangeBrightness.cpp from Github:
      Download ChangeBrightness.cpp

    4. Paste full source code and Run it (Ctrl+F5 or F5).

    OUTPUT
    Load an Image OpenCV
    Load Image OpenCV
    Increase Brightness of an Image
    Increase Brightness of an Image - OpenCV
    Decrease Brightness of an Image
    Decrease Brightness of an Image - OpenCV


    Explaination :
    Function used: 
    img.convertTo(imgInc, -1, 1, 25) - This function can process images and increase brightness by 25 units.
    img.convertTo(imgDec, -1, 1, -25) - This function can process images and decrease brightness by 25 units.
    • 1st parameter is the output matrix.
    • 2nd parameter is Depth of the output image. If rtype is negative, output type is same as the input type.
    • 3rd parameter is the multiplication or scaling factor, every pixel will be multiplied by this value.
    • 4th parameter is delta factor added to the scaled values.


    Like, Share and Comment Below. You may also like this:


  • Change Contrast of an Image


  • Apply Blur Filter Effect on an Image

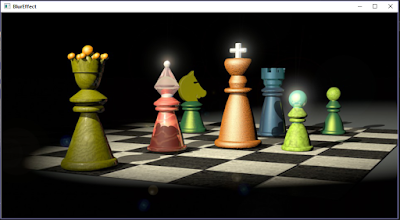
    Steps to Apply Blur Filter Effect on an Image | OpenCV with Visual Studio in Windows 10. In this Tutorial, we are going to apply Blur Filter Effect on an image using OpenCV.
    1. First of all, Follow this tutorial to Install & Configure OpenCV with Visual Studio 2015

    2. Copy the Full Source Code to Apply Blur Filter on an Image from here:
    3. #include<opencv2/highgui/highgui.hpp>
      #include<opencv2/imgproc/imgproc.hpp>
      
      using namespace cv;
      
      int main()
      {
       //Load an Image
       Mat img = imread("C:/Briefcase/Chess.jpg", CV_LOAD_IMAGE_COLOR);
       namedWindow("Image", CV_WINDOW_AUTOSIZE);
       imshow("Image", img);
      
       //Blur Effect
       GaussianBlur(img, img, cv::Size(3, 3), 0);
       namedWindow("BlurEffect", CV_WINDOW_AUTOSIZE);
       imshow("BlurEffect", img);
      
       //Wait Key press
       cvWaitKey(0);
      
       //destroy
       cvDestroyWindow("Image");
       cvDestroyWindow("BlurEffect");
      
       return 0;
      }
      
      OR
      Get BlurEffect.cpp from Github:
      Download BlurEffect.cpp

    4. Paste full source code and Run it (Ctrl+F5 or F5).

    OUTPUT
    Load an Image OpenCV
    Load Image OpenCV
    Blur Filter Effect OpenCV
    Blur Image OpenCV


    Explaination : Function used: GaussianBlur(img, img, cv::Size(3, 3), 0) - This function can process images and blur an image.
    • 1st parameter is the source image.
    • 2nd parameter is the destination or resultant image which is a blur image.
    • 3rd parameter is the structuring element used.
    • 4th parameter is gaussian standard deviation in x direction (sigmaX)


    Like, Share and Comment Below. You may also like these:


  • Apply Erode Filter Effect on an Image
  • Apply Dilate Filter Effect on an Image
  • Apply Negative Filter Effect on an Image


  • Apply Negative Filter Effect on an Image

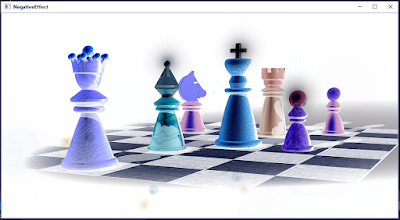
    Steps to Apply Negative Filter Effect on an Image | OpenCV with Visual Studio in Windows 10. In this Tutorial, we are going to apply Negative Filter Effect on an image using OpenCV.
    1. First of all, Follow this tutorial to Install & Configure OpenCV with Visual Studio 2015

    2. Copythe Full Source Code to Apply Negative Filter on an Image from here:
    3. #include<opencv2/highgui/highgui.hpp>
      
      #include<iostream>
      
      int main()
      {
       //Load an Image
       IplImage* img = cvLoadImage("C:/Briefcase/Chess.jpg");
       cv::namedWindow("Image", CV_WINDOW_AUTOSIZE);
       cvShowImage("Image", img);
      
       //Negative Effect
       cvNot(img, img);
       cv::namedWindow("NegativeEffect", CV_WINDOW_AUTOSIZE);
       cvShowImage("NegativeEffect", img);
      
       //Wait Key press
       cvWaitKey(0);
      
       //destroy
       cvDestroyWindow("Image");
       cvDestroyWindow("NegativeEffect");
      
       return 0;
      }
      
      OR
      Get NegativeEffect.cpp from Github:
      Download NegativeEffect.cpp

    4. Paste full source code and Run it (Ctrl+F5 or F5).

    OUTPUT

    Load an Image OpenCV
    Load Image OpenCV
    Negative Filter Effect OpenCV
    Negative Image OpenCV


    Explaination : Function used: cvNot(img, img) - This function can process images and invert every bit elment in an image.

    • 1st parameter is the source image.
    • 2nd parameter is the destination or resultant image which is a negative image.


    Like, Share and Comment Below. You may also like these:


  • Apply Blur Filter Effect on an Image
  • Apply Erode Filter Effect on an Image
  • Apply Dilate Filter Effect on an Image


  • Apply Dilate Filter Effect on an Image

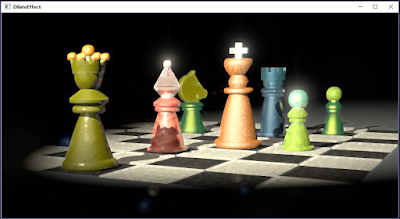
    Steps to Apply Dilate Filter Effect on an Image | OpenCV with Visual Studio in Windows 10. In this Tutorial, we are going to apply Dilate Filter Effect on an image using OpenCV.
    1. First of all, Follow this tutorial to Install & Configure OpenCV with Visual Studio 2015

    2. Copy the Full Source Code to Apply Dilate Filter on an Image from here:
    3. #include<opencv2/highgui/highgui.hpp>
      
      #include<iostream>
      
      int main()
      {
       //Load an Image
       IplImage* img = cvLoadImage("C:/Briefcase/Chess.jpg");
       cv::namedWindow("Image",CV_WINDOW_AUTOSIZE);
       cvShowImage("Image", img);
      
       //Dilate Effect
       cvDilate(img, img, 0, 2);
       cv::namedWindow("DilateEffect", CV_WINDOW_AUTOSIZE);
       cvShowImage("DilateEffect", img);
      
       //Wait Key press
       cvWaitKey(0);
      
       //destroy
       cvDestroyWindow("Image");
       cvDestroyWindow("DilateEffect");
      
       return 0;
      }
      
      OR
      Get DilateEffect.cpp from Github:
      Download DilateEffect.cpp

    4. Paste full source code and Run it (Ctrl+F5 or F5).

    OUTPUT
    Load an Image OpenCV
    Load Image OpenCV
    Dilate Filter Effect OpenCV
    Dilated Image OpenCV


    Explaination : Function used: cvDilate(img, img, 0, 2) - This function can process images and dilate an image.
    • 1st parameter is the source image.
    • 2nd parameter is the destination or resultant image which is a dilated image.
    • 3rd parameter is the structuring element used. If it is 0, a 3 X 3 rectangular structuring element is used.
    • 4th parameter is the number of times, effect is applied.


    Like, Share and Comment Below. You may also like these:


  • Apply Blur Filter Effect on an Image
  • Apply Erode Filter Effect on an Image
  • Apply Negative Filter Effect on an Image


  • Apply Erode Filter Effect on an Image

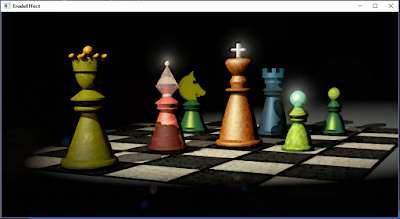
    Steps to Apply Erode Filter Effect on an Image | OpenCV with Visual Studio in Windows 10. In this Tutorial, we are going to apply Erode Filter Effect on an image using OpenCV.
    1. First of all, Follow this tutorial to Install & Configure OpenCV with Visual Studio 2015

    2. Copy the Full Source Code to Apply Erode Filter on an Image from here:
    3. #include<opencv2/highgui/highgui.hpp>
      
      #include<iostream>
      
      int main()
      {
       //Load an Image
       IplImage* img = cvLoadImage("C:/Briefcase/Chess.jpg");
       cv::namedWindow("Image", CV_WINDOW_AUTOSIZE);
       cvShowImage("Image", img);
      
       //Erode Effect
       cvErode(img, img, 0, 2);
       cv::namedWindow("ErodeEffect", CV_WINDOW_AUTOSIZE);
       cvShowImage("ErodeEffect", img);
      
       //Wait Key press
       cvWaitKey(0); 
      
       //destroy
       cvDestroyWindow("Image");
       cvDestroyWindow("ErodeEffect");
      
       return 0;
      }
      
      OR
      Get ErodeEffect.cpp from Github:
      Download ErodeEffect.cpp

    4. Paste full source code and Run it (Ctrl+F5 or F5).

    OUTPUT
    Load an Image OpenCV
    Load Image OpenCV
    Erode Filter Effect OpenCV
    Eroded Image OpenCV


    Explaination : Function used: cvErode(img, img, 0, 2) - This function can process images and erode an image.

    • 1st parameter is the source image.
    • 2nd parameter is the destination or resultant image which is an eroded image.
    • 3rd parameter is the structuring element used. If it is 0, a 3 X 3 rectangular structuring element is used.
    • 4th parameter is the number of times, effect is applied.


    Like, Share and Comment Below. You may also like these:


  • Apply Blur Filter Effect on an Image
  • Apply Dilate Filter Effect on an Image
  • Apply Negative Filter Effect on an Image


  • Object Detection and Tracking using Color Separation

    Steps for Object Detection & Tracking | OpenCV with Visual Studio in Windows 10. In this Tutorial, we are going to Detect and Track a Yellow Ball using Object Detection (Color Separation) OpenCV.
    1. First of all, Follow this tutorial to Install & Configure OpenCV with Visual Studio 2015

    2. Copy the Full Source Code for Object Detection and Tracking from here:
    3. #include <opencv2/core/core.hpp>
      #include <opencv2/highgui/highgui.hpp>
      #include <opencv2/imgproc/imgproc.hpp>
      
      #include <iostream>
      
      /*
      TRACK A YELLOW BALL - OBJECT DETECTION METHOD USING COLOR SEPERATION OPEN CV 3.1.0
      author - Rachit Gulati
      */
      
      int main() {
      
       cv::VideoCapture capWebcam(0);  // declare a VideoCapture object to associate webcam, 0 means use 1st (default) webcam
      
       if (capWebcam.isOpened() == false)  //  To check if object was associated to webcam successfully
       {    
        std::cout << "error: Webcam connect unsuccessful\n"; // if not then print error message
        return(0);            // and exit program
       }
      
       cv::Mat imgOriginal;  // Input image
       cv::Mat hsvImg;    // HSV Image
       cv::Mat threshImg;   // Thresh Image
      
       std::vector v3fCircles;  // 3 element vector of floats, this will be the pass by reference output of HoughCircles()
      
       char charCheckForEscKey = 0;
      
       int lowH = 21;       // Set Hue
       int highH = 30;
      
       int lowS = 200;       // Set Saturation
       int highS = 255;
      
       int lowV = 102;       // Set Value
       int highV = 225;
       // HUE for YELLOW is 21-30.
       // Adjust Saturation and Value depending on the lighting condition of the environment as well as the surface of the object.
      
       while (charCheckForEscKey != 27 && capWebcam.isOpened()) {    // until the Esc is pressed or webcam connection is lost
        bool blnFrameReadSuccessfully = capWebcam.read(imgOriginal);  // get next frame
      
        if (!blnFrameReadSuccessfully || imgOriginal.empty()) {    // if frame read unsuccessfully
         std::cout << "error: frame can't read \n";      // print error message
         break;               // jump out of loop
        }
      
        cv::cvtColor(imgOriginal, hsvImg, CV_BGR2HSV);      // Convert Original Image to HSV Thresh Image
      
        cv::inRange(hsvImg, cv::Scalar(lowH, lowS, lowV), cv::Scalar(highH, highS, highV), threshImg);
      
        cv::GaussianBlur(threshImg, threshImg, cv::Size(3, 3), 0);   //Blur Effect
        cv::dilate(threshImg, threshImg, 0);        // Dilate Filter Effect
        cv::erode(threshImg, threshImg, 0);         // Erode Filter Effect
      
        // fill circles vector with all circles in processed image
        cv::HoughCircles(threshImg,v3fCircles,CV_HOUGH_GRADIENT,2,threshImg.rows / 4,100,50,10,800);  // algorithm for detecting circles  
      
        for (int i = 0; i < v3fCircles.size(); i++) {      // for each circle
                     
         std::cout << "Ball position X = "<< v3fCircles[i][0]   // x position of center point of circle
          <<",\tY = "<< v3fCircles[i][1]        // y position of center point of circle
          <<",\tRadius = "<< v3fCircles[i][2]<< "\n";     // radius of circle
      
                          // draw small green circle at center of object detected
         cv::circle(imgOriginal,            // draw on original image
          cv::Point((int)v3fCircles[i][0], (int)v3fCircles[i][1]),  // center point of circle
          3,                // radius of circle in pixels
          cv::Scalar(0, 255, 0),           // draw green
          CV_FILLED);              // thickness
      
                          // draw red circle around object detected 
         cv::circle(imgOriginal,            // draw on original image
          cv::Point((int)v3fCircles[i][0], (int)v3fCircles[i][1]),  // center point of circle
          (int)v3fCircles[i][2],           // radius of circle in pixels
          cv::Scalar(0, 0, 255),           // draw red
          3);                // thickness
        } 
      
        // declare windows
        cv::namedWindow("imgOriginal", CV_WINDOW_AUTOSIZE);
        cv::namedWindow("threshImg", CV_WINDOW_AUTOSIZE); 
      
           /* Create trackbars in "threshImg" window to adjust according to object and environment.*/
        cv::createTrackbar("LowH", "threshImg", &lowH, 179); //Hue (0 - 179)
        cv::createTrackbar("HighH", "threshImg", &highH, 179);
      
        cv::createTrackbar("LowS", "threshImg", &lowS, 255); //Saturation (0 - 255)
        cv::createTrackbar("HighS", "threshImg", &highS, 255);
      
        cv::createTrackbar("LowV", "threshImg", &lowV, 255); //Value (0 - 255)
        cv::createTrackbar("HighV", "threshImg", &highV, 255);
        
      
        cv::imshow("imgOriginal", imgOriginal);     // show windows
        cv::imshow("threshImg", threshImg);
      
        charCheckForEscKey = cv::waitKey(1);     // delay and get key press
       }
       
       return(0);           
      }
      
      OR
      Get ObjectTracker.cpp from Github:
      Download ObjectTracker.cpp

    4. Paste full source code and Run it (Ctrl+F5 or F5).
    OUTPUT

    Yellow Ball Detection using Color Separation
    Yellow Ball Detection and Tracker OpenCV
    Yellow Ball Threshold Image
    Yellow Ball Threshold Image
    Coordinates and Radius of Yellow Ball
    X-Coord, Y-Coord and Radius Of Yellow Ball


    Explaination: You can use trackbars in "threshImg" window to adjust Hue, Saturation, Value according to object and environment(lightning), Hue values of basic colors:

    • Yellow 21- 30
    • Blue 75-130
    • Violet 130-160
    • Orange 0-21
    • Green 38-75
    • Red 160-179
    You have to find the exact range of HUE values according to the color of the object. The SATURATION and VALUE is depend on the lighting condition of the environment as well as the surface of the object.


    Like, Share and Comment Below

    Installing & Configuring with Visual Studio

    Installing Opencv c++ tutorial
    How to Install And Configure OpenCV with Visual Studio
    Steps for Installing & Configuring OpenCV with Visual Studio in Windows 10. Using:
    • Windows 10 64-bit
    • Visual Studio Community Edition 2015 Update 1
    • OpenCv 3.1.0
    1. Download and install Visual Studio 2015 Community Edition. It's free and choosing all default option including VC++ will work fine.

    2. Download latest version of OpenCV. I am using OpenCV 3.1.0

    3. Make a folder of your OpenCV version. for example "C:\OpenCV-3.1.0"

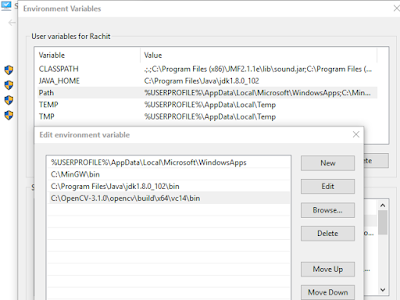
    4. Add the bin directory of OpenCV to the operating system path.
      a) Go to: System Properties -> Advanced Sytem Settings -> Environment Variables -> Edit Path Variable
      b) Add new path value to "C:\OpenCV-3.1.0\opencv\build\x64\vc14\bin" and Apply Changes.

    5. OpenCV Advanced System Settings

      OpenCV Environment Path Setup

    6. Start Visual Studio, choose File->New->Project


    7. Choose Visual C++, Empty Project, name your project, example "Test", Set preferred location, uncheck "Create directory for solution" and "Add to source control", Choose Ok.

    8. Right Click in Solution Explorer,Choose Add -> New Item. Choose "C++ File", name the file, example "ObjectTracking.cpp". Choose Add.

    9. In the Visual Studio toolbar, verify that "Solution Configurations" is set to "Debug", then change "Solution Platforms" to "x64"

    10. OpenCv Visual Studio Debug x64

    11. In VS 2015 go to:
      a) Project -> (project name) Properties -> Configuration Properties -> VC++ Directories -> Include Directories add the include directory for your version of OpenCV, ex "C:\OpenCV-3.1.0\opencv\build\include"
      b) Project -> Properties -> Configuration Properties -> VC++ Directories -> Library Directories: add the library directory for your version of OpenCV, ex "C:\OpenCV-3.1.0\opencv\build\x64\vc14\lib"
      c) Project -> Properties -> Configuration Properties -> Linker -> Input -> Additional Dependencies: Copy/paste the name of the debug lib(s) in the lib directory, ex "opencv_world310d.lib"

    12. Done ! You are ready to write code and Run your program.

    Like, Share and Comment Below