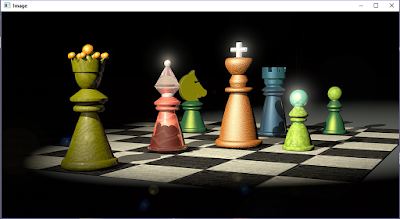
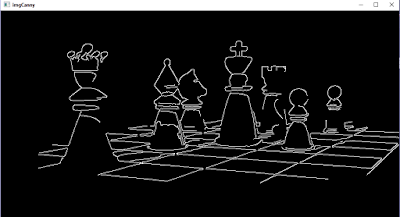
Steps to Canny Edge Detection on Webcam | OpenCV with Visual Studio in Windows 10. In this Tutorial, we are going to implement Canny Edge Detection on Webcam using OpenCV.
Explaination : Function used: cv::Canny(imgBlurred,imgCanny,lowTh,highTh) - This function can process images and implement the Canny Edge Detector Algorithm.
Like, Share and Comment Below. You may also like this
Apply Canny Edge Effect on an Image
- First of all, Follow this tutorial to Install & Configure OpenCV with Visual Studio 2015
- Paste full source code and Run it (Ctrl+F5 or F5).
#include<opencv2/core/core.hpp>
#include<opencv2/highgui/highgui.hpp>
#include<opencv2/imgproc/imgproc.hp>

#include<iostream>
#include<conio.h>

int main() {
 cv::VideoCapture capWebcam(0);   // declare a VideoCapture object to associate webcam, 0 means use 1st (default) webcam

 if (capWebcam.isOpened() == false)  //  To check if object was associated to webcam successfully
 {
  std::cout << "error: Webcam connect unsuccessful\n"; // if not then print error message
  return(0);            // and exit program
 }

 cv::Mat imgOriginal;        // input image
 cv::Mat imgGrayscale;       // grayscale image
 cv::Mat imgBlurred;         // blured image
 cv::Mat imgCanny;           // Canny edge image

 char charCheckForEscKey = 0;
 int lowTh = 45;
 int highTh = 90;

 while (charCheckForEscKey != 27 && capWebcam.isOpened()) {            // until the Esc key is pressed or webcam connection is lost
  bool blnFrameReadSuccessfully = capWebcam.read(imgOriginal);   // get next frame

  if (!blnFrameReadSuccessfully || imgOriginal.empty()) {    // if frame read unsuccessfully
   std::cout << "error: frame can't read \n";      // print error message
   break;
  }

  cv::cvtColor(imgOriginal, imgGrayscale, CV_BGR2GRAY);                   // convert to grayscale

  cv::GaussianBlur(imgGrayscale,imgBlurred,cv::Size(5, 5),1.8);           // Blur Effect

  cv::Canny(imgBlurred,imgCanny,lowTh,highTh);       // Canny Edge Image

  //declare windows
  cv::namedWindow("imgOriginal", CV_WINDOW_NORMAL);
  cv::namedWindow("imgCanny", CV_WINDOW_NORMAL);
  //declare trackbar
  cv::createTrackbar("LowTh", "imgCanny", &lowTh, 100);
  cv::createTrackbar("HighTh", "imgCanny", &highTh, 100);
  // show windows
  cv::imshow("imgOriginal", imgOriginal);
  cv::imshow("imgCanny", imgCanny);

  charCheckForEscKey = cv::waitKey(1);        // delay and get key press
 }

 return(0);
}
ORGet CannyCam.cpp from Github:
Download CannyCam.cpp
 |
| Original Webcam Image OpenCV |
 |
| Canny Edge Image Webcam OpenCV |
Explaination : Function used: cv::Canny(imgBlurred,imgCanny,lowTh,highTh) - This function can process images and implement the Canny Edge Detector Algorithm.
- 1st parameter is the source image.
- 2nd parameter is the destination or resultant image.
- 3rd parameter is the low threshold value.
- 4th parameter is the high threshold value.
Like, Share and Comment Below. You may also like this
Wow useful for newbie like me..
ReplyDeletekeep share!!
Thanks, works perfect! But you need to add a "p" in line 3 "imgproc.hpp"
ReplyDelete