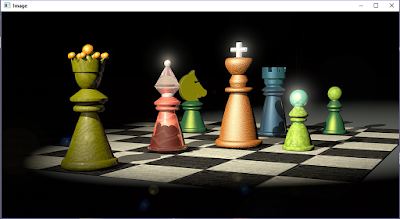
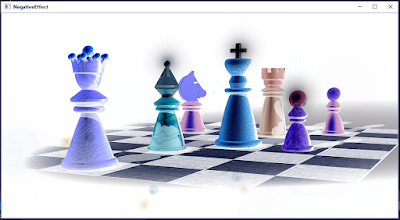
Steps to Apply Negative Filter Effect on an Image | OpenCV with Visual Studio in Windows 10. In this Tutorial, we are going to apply Negative Filter Effect on an image using OpenCV.
Explaination : Function used: cvNot(img, img) - This function can process images and invert every bit elment in an image.
Like, Share and Comment Below. You may also like these:
Apply Blur Filter Effect on an Image
Apply Erode Filter Effect on an Image
Apply Dilate Filter Effect on an Image
- First of all, Follow this tutorial to Install & Configure OpenCV with Visual Studio 2015
- Copythe Full Source Code to Apply Negative Filter on an Image from here:
- Paste full source code and Run it (Ctrl+F5 or F5).
#include<opencv2/highgui/highgui.hpp>

#include<iostream>

int main()
{
 //Load an Image
 IplImage* img = cvLoadImage("C:/Briefcase/Chess.jpg");
 cv::namedWindow("Image", CV_WINDOW_AUTOSIZE);
 cvShowImage("Image", img);

 //Negative Effect
 cvNot(img, img);
 cv::namedWindow("NegativeEffect", CV_WINDOW_AUTOSIZE);
 cvShowImage("NegativeEffect", img);

 //Wait Key press
 cvWaitKey(0);

 //destroy
 cvDestroyWindow("Image");
 cvDestroyWindow("NegativeEffect");

 return 0;
}
ORGet NegativeEffect.cpp from Github:
Download NegativeEffect.cpp
 |
| Load Image OpenCV |
 |
| Negative Image OpenCV |
Explaination : Function used: cvNot(img, img) - This function can process images and invert every bit elment in an image.
- 1st parameter is the source image.
- 2nd parameter is the destination or resultant image which is a negative image.
Like, Share and Comment Below. You may also like these:
No comments:
Post a Comment